Blog
News about our company, tutorials about IT and much more you will find in this page.
PowerDNS is a powerful and high-performance authoritative nameserver written in C++. It is an alternative to BIND DNS and uses MariaDB, MySQL, Oracle, and MariaDB to store records. PowerDNS runs on most UNIX-based operating systems and is used to host domains using DNSSEC. It uses a separate program called PowerDNS Recursor as the resolving DNS server. PowerDNS-Admin is an advanced web interface for PowerDNS used for managing zones and records through a web browser.
In this tutorial, we will show you how to install PowerDNS and PowerAdmin with MariaDB backend on CentOS 8.
Prerequisites
- A fresh CentOS 8 Dedicated Server or VPS on the Evoluso.com Cloud Platform
- A root password configured on your server
Login via SSH
Once you are logged in to your CentOS 8 server, run the following command to update your base system with the latest available packages.
dnf update -yStep 2 – Install LAMP Server
First, install the Apache and MariaDB server with the following command:
dnf install httpd mariadb-server -yOnce installed, start the MariaDB and Apache services and enable them to start at system reboot with the following command:
systemctl start httpd
systemctl start mariadb
systemctl enable httpd
systemctl enable mariadb
Next, you will need to install the latest version of PHP in your system. By default, the latest version of PHP is not available in CentOS 8, so you will need to add the Remi repository in your system. You can add it with the following command:
dnf install http://rpms.remirepo.net/enterprise/remi-release-8.rpm -yNext, disable the default PHP module and enable the PHP Remi module with the following command:
dnf module reset php
dnf module enable php:remi-7.4
Next, install PHP and other required modules with the following command:
dnf install php php-devel php-gd php-imap php-ldap php-mysql php-odbc php-pear php-xml php-xmlrpc php-mbstring php-mcrypt php-mhash gettext php-pear php-intl nano wget -yOnce all the packages are installed, you can proceed to the next step.
systemctl start php-fpm
systemctl enable php-fpm
Step 3 – Configure MariaDB Database
Next, you will need to create a database and user for PowerDNS. First, log in to MariaDB with the following command:
mysqlOnce logged in, create a database and user with the following command:
create database powerdnsdb;
create user 'powerdns' identified by 'password';
Next, grant all the privileges to the powerdnsdb with the following command:
grant all privileges on powerdnsdb.* to 'powerdns'@'localhost' identified by 'password';Next, flush the privileges with the following command:
flush privileges;Next, change the database to powerdnsdb and create table structures with the following command:
use powerdnsdb;
CREATE TABLE domains (
id INT AUTO_INCREMENT,
name VARCHAR(255) NOT NULL,
master VARCHAR(128) DEFAULT NULL,
last_check INT DEFAULT NULL,
type VARCHAR(6) NOT NULL,
notified_serial INT DEFAULT NULL,
account VARCHAR(40) DEFAULT NULL,
PRIMARY KEY (id)
) Engine=InnoDB;

CREATE UNIQUE INDEX name_index ON domains(name);

CREATE TABLE records (
id BIGINT AUTO_INCREMENT,
domain_id INT DEFAULT NULL,
name VARCHAR(255) DEFAULT NULL,
type VARCHAR(10) DEFAULT NULL,
content VARCHAR(64000) DEFAULT NULL,
ttl INT DEFAULT NULL,
prio INT DEFAULT NULL,
change_date INT DEFAULT NULL,
disabled TINYINT(1) DEFAULT 0,
ordername VARCHAR(255) BINARY DEFAULT NULL,
auth TINYINT(1) DEFAULT 1,
PRIMARY KEY (id)
) Engine=InnoDB;

CREATE INDEX name_index ON domains(name);

CREATE INDEX nametype_index ON records(name,type);

CREATE INDEX domain_id ON records(domain_id);

CREATE INDEX recordorder ON records (domain_id, ordername);

CREATE TABLE supermasters (
ip VARCHAR(64) NOT NULL,
nameserver VARCHAR(255) NOT NULL,
account VARCHAR(40) NOT NULL,
PRIMARY KEY (ip, nameserver)
) Engine=InnoDB;

CREATE TABLE comments (
id INT AUTO_INCREMENT,
domain_id INT NOT NULL,
name VARCHAR(255) NOT NULL,
type VARCHAR(10) NOT NULL,
modified_at INT NOT NULL,
account VARCHAR(40) NOT NULL,
comment VARCHAR(64000) NOT NULL,
PRIMARY KEY (id)
) Engine=InnoDB;

CREATE INDEX comments_domain_id_idx ON comments (domain_id);

CREATE INDEX comments_name_type_idx ON comments (name, type);

CREATE INDEX comments_order_idx ON comments (domain_id, modified_at);

CREATE TABLE domainmetadata (
id INT AUTO_INCREMENT,
domain_id INT NOT NULL,
kind VARCHAR(32),
content TEXT,
PRIMARY KEY (id)
) Engine=InnoDB;

CREATE INDEX domainmetadata_idx ON domainmetadata (domain_id, kind);

CREATE TABLE cryptokeys (
id INT AUTO_INCREMENT,
domain_id INT NOT NULL,
flags INT NOT NULL,
active BOOL,
content TEXT,
PRIMARY KEY(id)
) Engine=InnoDB;

CREATE INDEX domainidindex ON cryptokeys(domain_id);

CREATE TABLE tsigkeys (
id INT AUTO_INCREMENT,
name VARCHAR(255),
algorithm VARCHAR(50),
secret VARCHAR(255),
PRIMARY KEY (id)
) Engine=InnoDB;

CREATE UNIQUE INDEX namealgoindex ON tsigkeys(name, algorithm);
You can now list all tables with the following command:
show tables;You should see the following output:
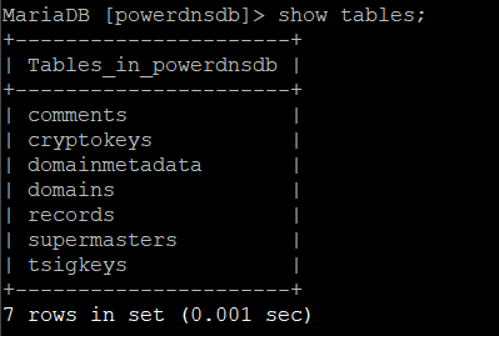
Next, exit from the MariaDB with the following command:
exit;Step 4 – Install PowerDNS
Before installing PowerDNS, you will need to disable systemd-resolve service. You can disable it with the following command:
systemctl disable systemd-resolved
systemctl stop systemd-resolved
Next, add new name server entry with the following command:
ls -lh /etc/resolv.conf
echo "nameserver 8.8.8.8" | tee /etc/resolv.conf
Finally, install PowerDNS with other required packages using the following command:
dnf install pdns pdns-backend-mysql bind-utils -yAfter installing PowerDNS, you will need to configure PowerDNS to use MySQL as backend instead of BIND. You can do it by editing the file /etc/pdns/pdns.conf:
nano /etc/pdns/pdns.confRemove the launch=bind line and add the following lines:
launch=gmysql
gmysql-host=localhost
gmysql-user=powerdns
gmysql-password=password
gmysql-dbname=powerdnsdb
Save and close the file, then start PowerDNS service and enable it to start on boot.
systemctl start pdns
systemctl enable pdns
Lets disable SELinux, restart httpd service and configure firewall
sudo systemctl reload httpd.service
firewall-cmd --zone=public --permanent --add-service=http
firewall-cmd --zone=public --permanent --add-service=https
firewall-cmd --zone=public --permanent --add-service=dns
firewall-cmd --reload
Disable SELinux
nano /etc/sysconfig/selinuxThen change the directive SELinux=enforcing to SELinux=disabled as shown in the below image. Like this:
SELINUX=disabledStep 5 – Install PowerAdmin
First, download the latest version of PowerAdmin (in this case 2.2.2) with the following command:
wget https://github.com/poweradmin/poweradmin/archive/refs/tags/v2.2.2.tar.gzOnce downloaded, extract the downloaded file with the following command:
tar xvzf v2.2.2.tar.gzNext, move the extracted directory to the Apache root directory:
mv poweradmin-2.2.2 /var/www/html/poweradmin/Next, change the ownership of the poweradmin directory to apache with the following command:
chown -R apache:apache /var/www/html/poweradminStep 6 – Access PowerAdmin Web Interface
Now, open your web browser and access the PowerAdmin web interface using the URL http://your-server-ip/poweradmin/install. You should see the following page:
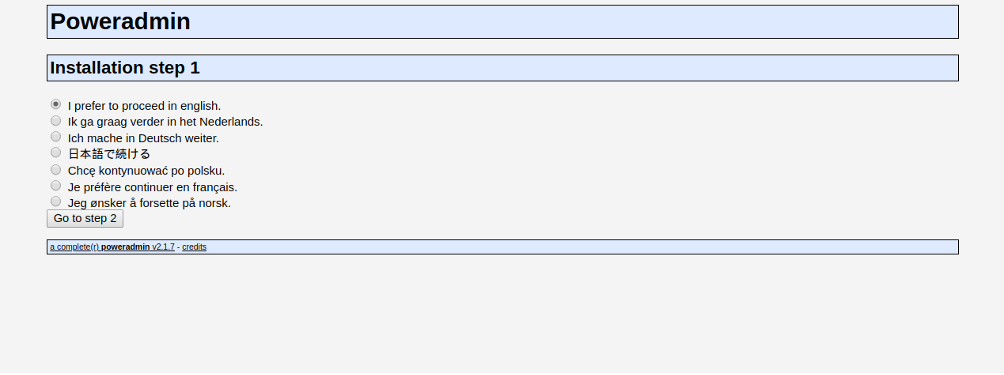
Select your desired language and click on “Go to step 2.” You should see the following page:
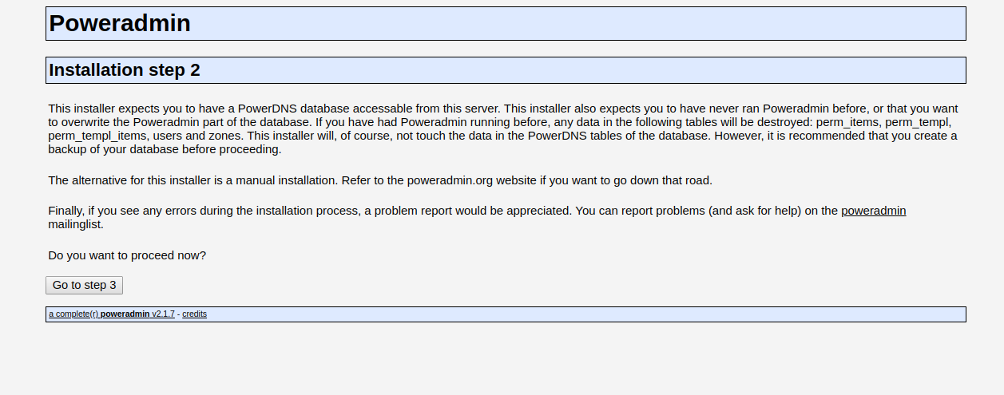
Now, click on “Go to step 3.” You should see the following page:
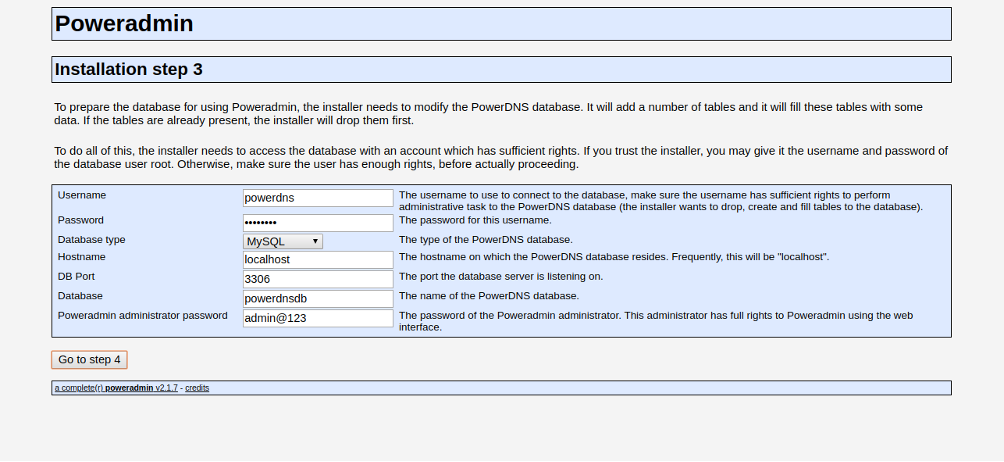
Provide your PowerDNS database details and administrator password and click on “Go to step 4.” You should see the following page:
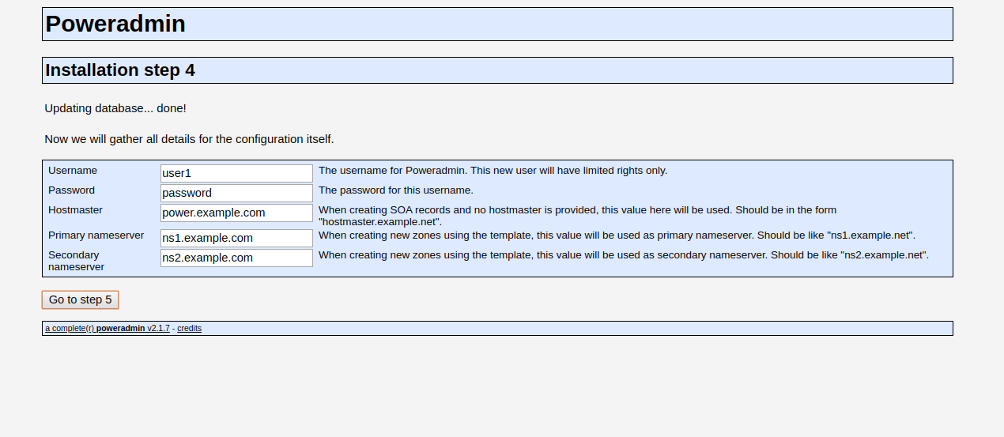
Provide the PowerDNS user, password, host, and nameserver and click on “Go to step 5.” You should see the following page:
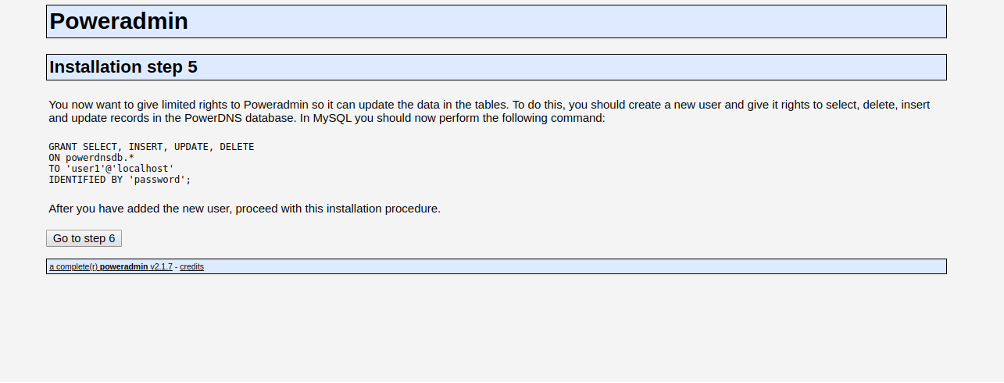
Now, open your terminal, log in to MySQL, and grant the new user all required permissions with the following command:
GRANT SELECT, INSERT, UPDATE, DELETE ON powerdnsdb.* TO 'user1'@'localhost'
IDENTIFIED BY 'password';
Next, click on “Go to step 6.” You should see the following page:
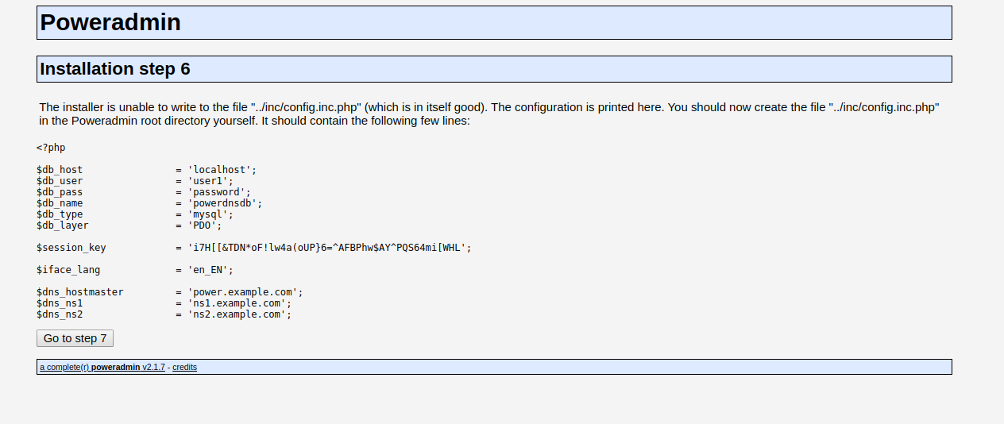
Now, create a new file named config.inc.php as shown below:
nano /var/www/html/poweradmin/inc/config.inc.phpPaste the content from the web page:
<?php

$db_host = 'localhost';
$db_user = 'user1';
$db_pass = 'password';

$db_name = 'powerdnsdb';
$db_type = 'mysql';
$db_layer = 'PDO';

$session_key = 'MMK})04xlEHD[UpE1{^3tL@4+jlSIYilM3jRLI#NIJJac#';

$iface_lang = 'en_EN';

$dns_hostmaster = 'power.example.com';
$dns_ns1 = 'ns1.example.com';
$dns_ns2 = 'ns2.example.com';
Save and close the file, then click on “Go to step 7.” Once the installation has been completed, you should see the following page:
Next, open your terminal and remove the installation directory with the following command:
rm -rf /var/www/html/poweradmin/install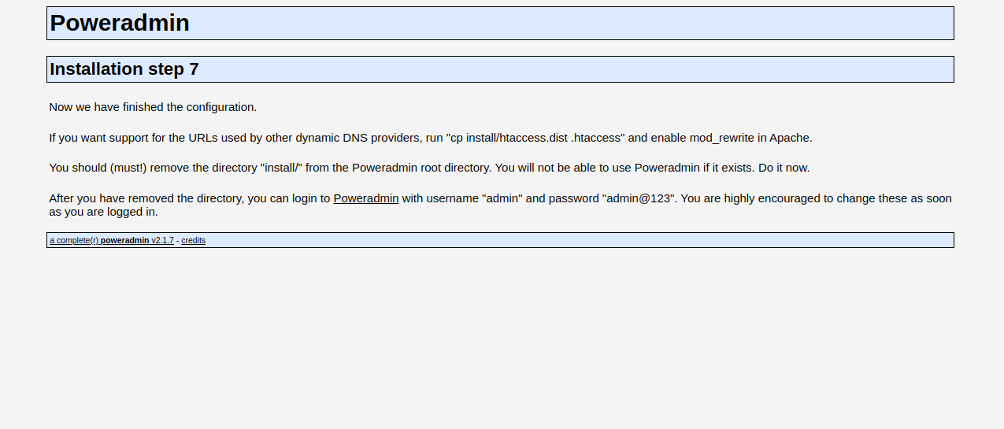
Click on the Poweradmin. You should see the Poweradmin login page:

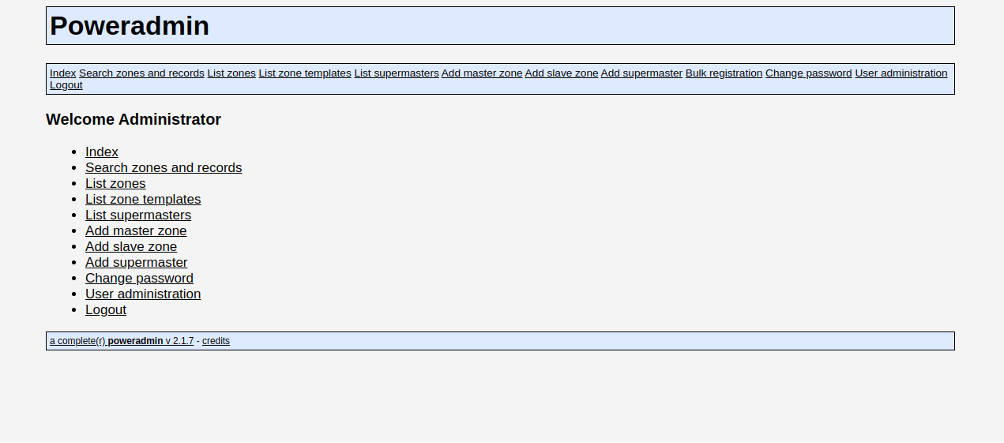
Provide your admin username and password which you created earlier and click on the Go button. You should see the Poweradmin dashboard in the following page:
Optional: Allow external access
firewall-cmd --add-rich-rule 'rule family="ipv4" source address="YOUR_SERVER_IP" service name="mysql" accept' --permanent

firewall-cmd --reload
Conclusion
Congratulations! You have successfully installed PowerDNS and Poweradmin on CentOS 8. You can now easily create and manage a new zone and record through the Poweradmin web interface. For more information, visit the PowerDNS official documentation. Get started with PowerDNS and Poweradmin on Dedicated Server from Evoluso.com today!
